- Equipment
- Inks & Supplies
- Services
- Applications
- Tagless
- Resources
- About Us
- Contact Us

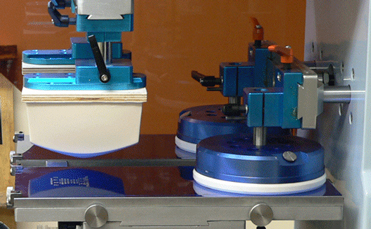
Inkcups takes pride in offering the best technical support in the industry. If you own a pad printing machine, whether you use it for printing on promotional products or garment tag printing, proper loading of the plates and cups into the machine is key to getting a great print. The following is a 5 step procedure that will ensure proper plate and cup installation.
1. Thoroughly clean the magnetic sub-plate and back of the print plate.
2. Make sure the plate is laying flat on top of the sub-plate. While applying pressure to the center on the plate, finger tighten the hold-down knobs on one end, then repeat on the other end. DO NOT OVER-TIGHTEN or you may distort the plate and cause doctoring problems
• Clean the ring edge before putting on the plate (every time.)
• Always place the ink cup gently on the plate at the end opposite to the image area.
• OPEN THE VENT PLUG BY TURNING COUNTER-CLOCKWISE – let it sit for a minute, then re-tighten. This lets air out of the ink cup and enables the ring to set properly on the plate.
• Slide the locking pin up and down several times and move the cup manually (rotate the cup, do not push) to make sure there is no interference between cup and pin.
• Make sure the pin is not seated directly on the bottom of the hole.
• Before turning on the machine, manually break free the cup from its location on the plate. This is done in case the ring has settled into the plate material which would result in damaged plates when the machine cycle is initiated
Contact Inkcups Now for additional information!
Printer used in this project:
Type: Pad Printer
Brand: ICN
Model: B100, B150, 2200(PS, PSx)
Standard applications: Bottles, Garment Tag Labels, Cups, Mugs…
More info: ICN’s Pad Printer page
Add Your Comment